Friday, June 21, 2013

The Beginning Part 2

     Okay, on to the fun part. Putting together this planked top was certainly the most labor intensive part of the entire process for me. All that labor meant I got more lazy about taking pictures, so I'll just do my best to explain the process I followed. Let me start by initially reiterating what Ana says in her walkthrough. BUY STRAIGHT BOARDS! I made absolute sure when I was purchasing my 2x6's that I was being as picky as I could be and I STILL had some minor difficulties, so just remember to be very selective.

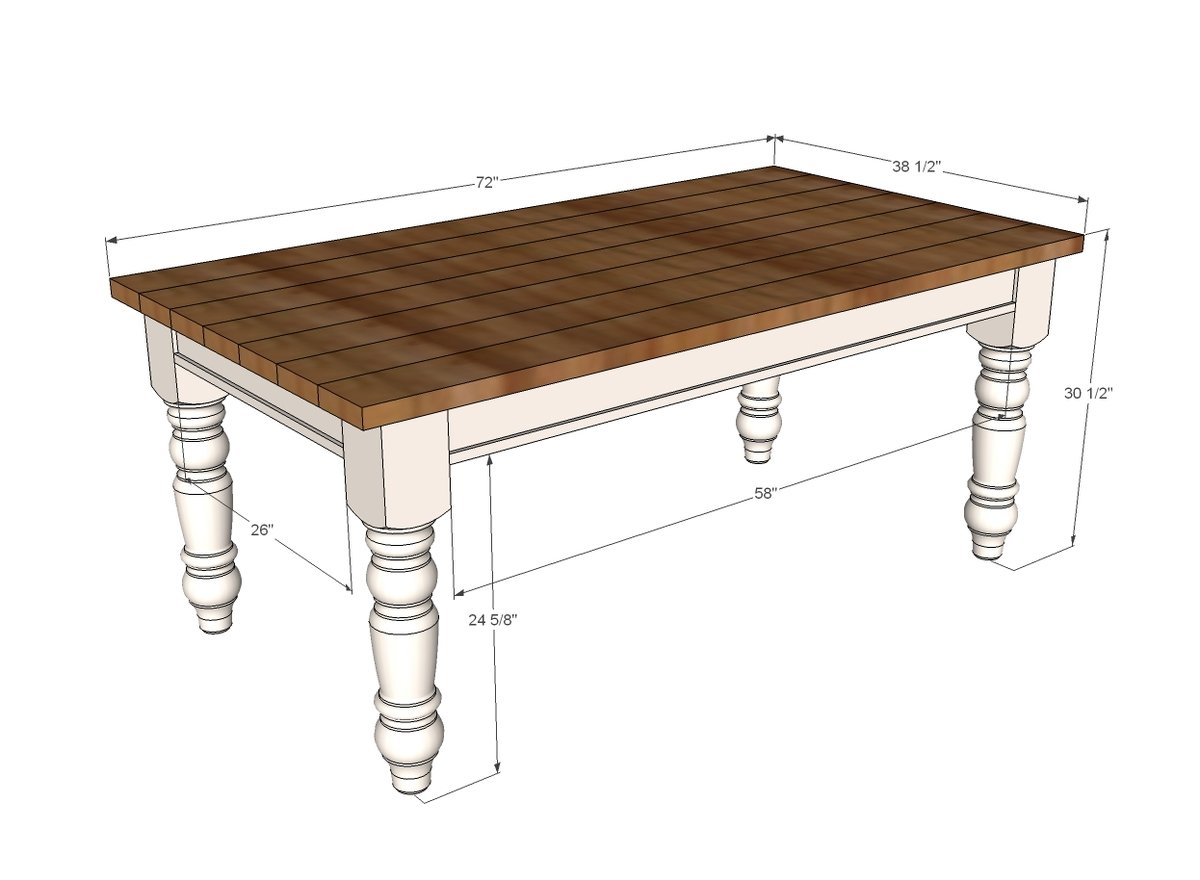
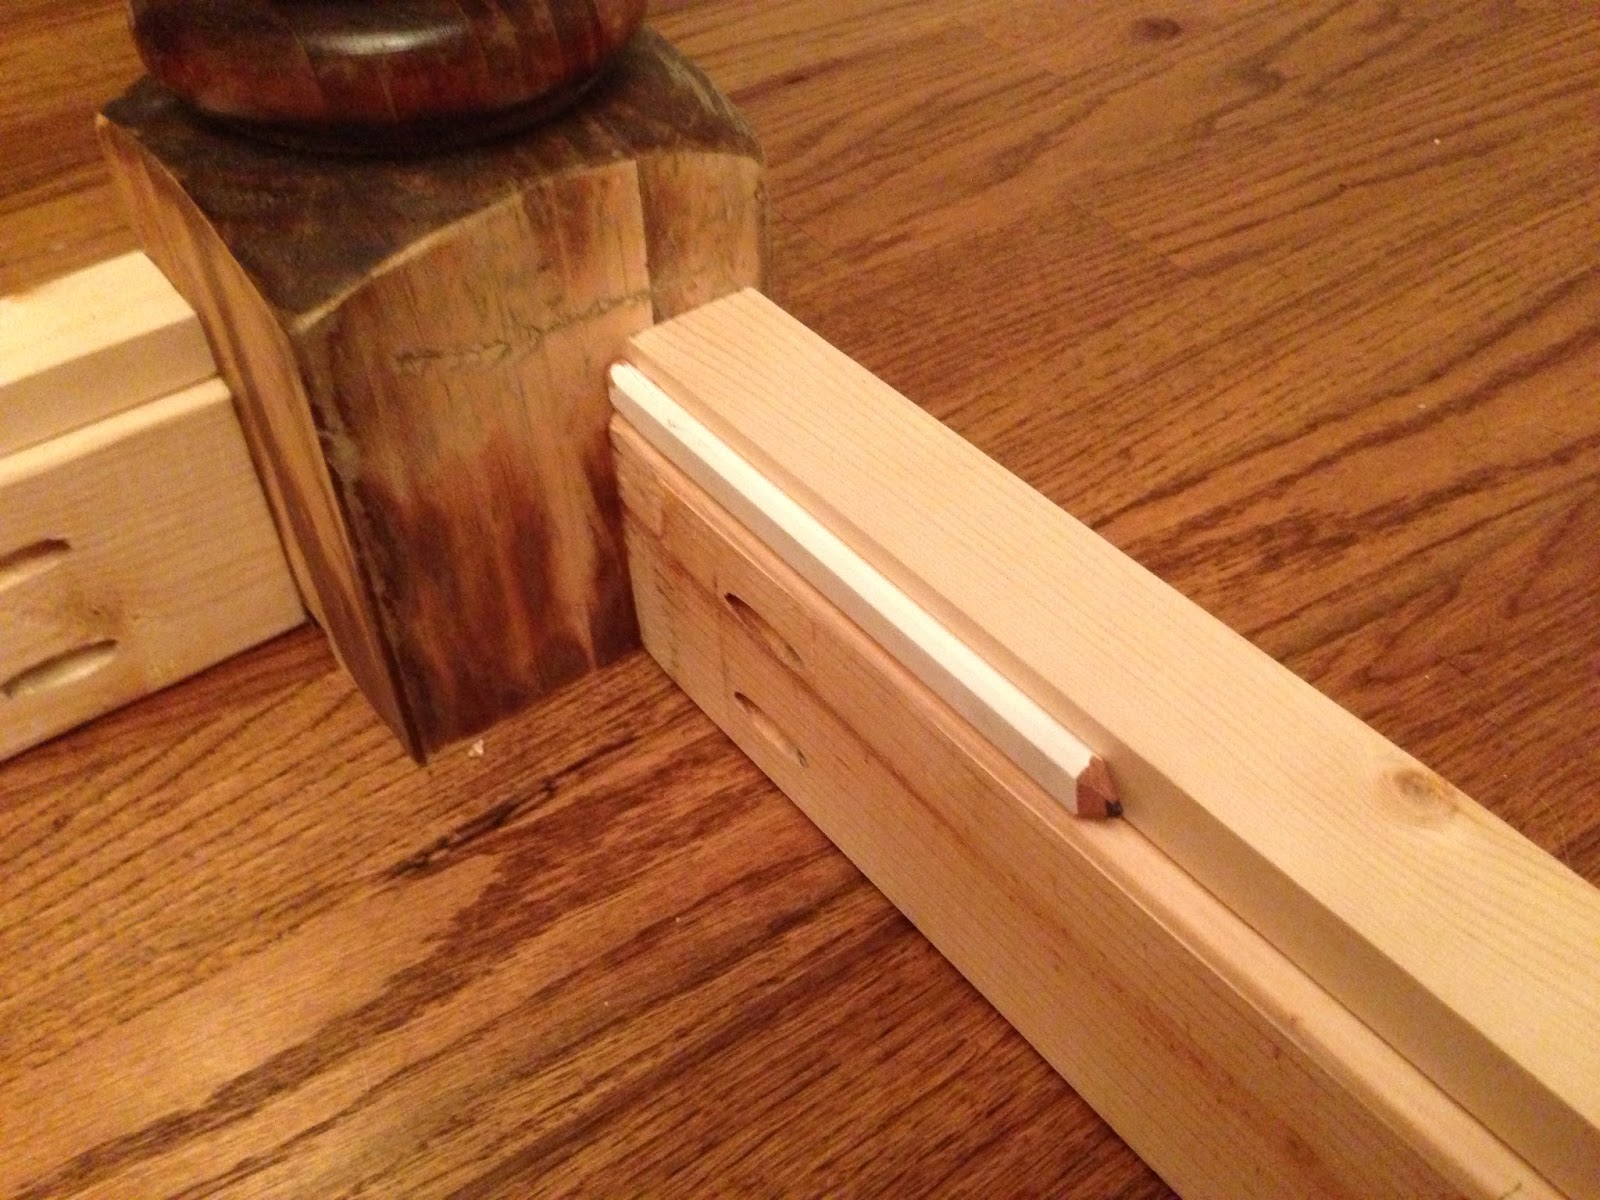
     First things first, you'll want to cut your 2x6's to size but I honestly wouldn't worry about absolute precision here because I wound up running a circular saw down the ends to ensure perfection after the boards were joined. Secondly, lets make sure you get your pocket-holes taken care of correctly. Ana doesn't give an example of the pocket-holes on this particular walkthrough buuut we can just borrow one from her original Farmhouse table shown below.


Courtesy of Ana-White.com
     Please note the example above is NOT an exact representation our our tabletop. We use 7 2x6's and as shown below. The center plank (shown in blue) will have no pocket-holes. What I did was join the three planks on the right together and then the 3 on the left and then joined them to the middle, making sure that the pocket holes on either side of the middle plank are facing in the direction of the middle plank.
Pocket-hole guide
     As I just mentioned, I joined the top in three steps out of necessity as my workbench was not big enough to accommodate it being done all together. The process that I followed to get my tabletop as straight as possible was to lay a 2x4 across each end spanning the width and clamping from the 2x4 to my workbench to ensure the planks were all laid down as flat as I could get them. Then I took two longer clamps and clamped them the width of the planks as well to ensure the boards were pulled together very tight. Make sure none of your clamps are covering pocket-holes and then screw them together with 2-1/2" PH screws. 

     Once my tabletop was joined together I mentioned I ran a circular saw down the ends and to do that I followed Ana's video guide here. So after the all the work done to ensure a nice flat, even tabletop - I STILL had a lot of work to to. I busted out the random orbital sander and spent the next few hours before bed sanding the top as flat and smooth as I could. I brought one of our dinner plates out and while the plate did not rock at all, you certainly knew you were going across planks if slid over the width. I'm still very happy with my results just know I wasn't able to achieve absolute perfection, which I should mention is one of my downfalls - I always expect that out of myself - sometimes to no good end!


. . . . .

     In-between all the work with the tabletop I applied another coat of paint to the base of the table and once that dried, hit it with a sanding pad to help create that aged "Old World Finish" that Ana also has a walkthrough for here. And wouldn't you know, its for this table too!


Distressed look on the legs
. . . . .

     The next part of the walkthrough was the only part I ran into any real problems.  Ana created another walkthrough for Staining and Finishing Tabletops for this exact table and while there is no mention of it in the walkthrough, Ana responds in the comments section

"My sister really wanted a planked look - like boards are just resting on top - but functionality at the same time. So we choose not to use tongue and groove, but did Kreg Jig all the boards together. There were a few boards that were not as cooperative as I'd have liked, so I did fill any open gaps with clear silicone before applying the top coat (but after the stain). The top coat then really filled all the gaps so it's easy to wipe clean."

     So being the studious gent that I am, I decided to silicone in-between the planks. Used my finger to run the silicone smooth and then used a lightly damp cloth to remove any excess residue. Ana said she did this AFTER the stain but BEFORE top coat. THIS IS WHERE THINGS GO SOUTH! After the silicone cured clear, I applied the Helmsman Spar and let it dry, and plain as day there was a noticeable color difference where the planks meet. Either I didn't do a good enough job cleaning the residue or the silicone didn't interact well with the Spar or the stain - or both?!? Either way I knew I was going to have to un-do A LOT of work. Afterwards I went back and re-read her comment and realized that she said "open gaps". All of my diligence with the clamps ensured I really didn't have any obvious open gaps.

     I waited a day or so until the Spar appeared dry and broke out the sander again and got to work only to find some spots on the table must not have been as dry as others because when the sander hit those spots it immediately looked like I poured a thick molasses on the sanding disc. Because of this I probably went through 7-8 discs before I had the top re-sanded back down. If I had it to do over again, I would still use the silicone as I want this table to last generations - I would just apply BEFORE the stain so that I could still lightly sand where the planks meet to ensure no residue was left, THEN I would stain and topcoat. 

     So, I wound up re-staining the top and this time I decided to thin the spar with some odorless mineral spirits as I had read somewhere this would help achieve a slightly more matte finish and also speed the drying time. Lightly sand in-between top coats and repeat the process until you are satisfied with the results. As Ana commented, I agree that the top coat really does fill in any gaps for a very easy to wipe surface.

     With the top dried all that was left to do was put that bad boy together. I carefully brought the tabletop in from the garage and laid it top down onto some towels.

A very curious chocolate lab

     Anyways, a few measurements to get the placement right and now it's time to take advantage of those pocket-holes we drilled earlier. Using 2-1/2" pocket holes, attach the tabletop and have someone help you flip it over to see your finished project in all it's glory!

My labor of love

     I was able to find some old weathered chairs on Craigslist and negotiated the price to $25 a chair if I purchased all 6. I just felt like they totally matched the theme I was trying to achieve and had to have them. $150 may seem like a lot to spend but I could barely get 1 chair for that price much less 6 in some local decor stores. All we need now is some decor to bring this room to life but we'll save that for another blog. So there you have it, my first real project. I can't imagine being more proud of another build. I hope you all enjoy!

Thursday, June 20, 2013

The Beginning Part 1

     I remember the looks from family as they peered in my dining room and saw a half put together table, legs only at this point, painted and weathered. "Yeah, I'm building a table" I told them. The looks were vaguely tinged with doubt and the unasked questions, "Seriously?", "When did you get so handy?" Honestly it was more the moment when I got tired of not being handy. The rest, well - it's the reason I started this blog. I hope you enjoy.
. . . . .

     I don't remember how I stumbled across Ana White's site but somehow I did; immediately I was drawn in. It's one thing to see Ana build a nice table, bench or headboard and think, "that looks easy but she's a pro" and entirely something else to see the incredible Brag Posts that everyday people like myself submit. It was definitely the brag posts that convinced me I could actually build this stuff! Just reading the comments and following the brags, I already had a handful of other bloggers and DIYers I was following. I was hooked!

     Initially I set out to build the Farmhouse Table. I went and bought the lumber and had everything ready to go and as fate would have it before the first lick of work was started I saw another table on Ana's site and knew immediately, this was the table I had to build. The table that changed my mind was Ana's Husky Farmhouse Table, with store-bought legs built for her sister. Starting at $50 a leg I knew I was going to have to get creative to come up with a convenient solution for the legs. This put the project on hold for a bit.

     After a few weeks of reading blogs and seeing ordinary people transform ordinary items into new treasures, I began to look at everything differently. An old door was no longer an old door but part of a hall tree and the glass panes - picture frames. Actually, it was an old wooden door with glass panes leaning against and even older shop that gave me pause. I parked the car and knocked on the door of a house adjoining the property and was greeted by a lovely lady who told me she just set it out to sell. I asked her price and she was willing to sell it to me for $10 as the backside has some scratches from the old dog; I told her she had herself a deal! I was in my car so I'd have to come back with the truck. 30 minutes later I was back. If you knew my luck you'd not it was no surprise that just then, it started raining. Now I'm in a rush to get the door loaded without breaking any of the panes when out of the corner of my eye I saw an old headboard and footboard, broken and busted. They weren't anything particularly nice to look at but the posts seemed to be in good shape - I had found my legs! Soaking wet, I trodded back to up the door and asked how much for the legs. They were garbage she said, unusable and I could take them no charge. "Come back and pay me whatever if you can use them", she said. I'm happy to report, I stopped in to pay her for those legs recently; she told me seeing a picture of the result was payment enough and refused to accept a dime. There are still great people in this world. Sometimes you might have to knock on a strangers door to meet them!

The legs and lumber needed to build the base.
. . . . .
     
You can find the plans, shopping list and cut list for the Husky Farmhouse Table in PDF form here. To the left I have the legs and lumber cut to plan and ready to be assembled. I will talk about the finish shortly, but I wanted the legs in particular to have a very aged look so I opted not to fully sand them in hopes that the paint wouldn't stick as easily so I'd have more chipping and cracking. This didn't quite work to the extent that I'd hoped but I am still pleased with the results nonetheless. The measurements below show that from the bottom of the legs to the top of the planked tabletop to be 30-1/2". Subtracting the 1-1/2" that is the actual measurement of the 2x4 tells me I have to cut my legs to 29". This isn't mentioned in the cut list so I thought I'd share that for anyone looking to repurpose their own legs for this project. As you may notice I had to fill in quite a few holes with wood filler from where the head and footboards were removed. the holes were fairly deep so I used thin pieces of 2x4 to fill in the holes before I filled the rest in with wood filler. I'd never read anywhere or been instructed to do this it just seemed like an easy way to conserve wood filler.

Courtesy of Ana-white.com
     When assembling the base make sure to follow the instructions regarding placement of your pocket-holes. You will want to drill (2) 1-1/2" pocket-holes at the end of each apron for attaching to the legs but also make sure to drill holes facing upwards on the inside of the aprons for attaching the tabletop.

Legs and aprons assembled
     The picture above shows the legs and aprons assembled. I used wood glue and 1-1/2" Kreg screws to attach everything. The plan calls for the apron to be inset 3/4" all the way around. I used leftover pieces of the 1x2's to get my 3/4" inset.

1x2 scraps used for 3/4" inset

     It is also recommended by Ana to set out the 1x2's a little for a decorative touch and so I just used my pencil as my guide on this before nailing in place.

Pencil used to outset for decoration
     I stained the aprons but forgot to picture that step and later slapped on the first coat of Milk Paint in Light Cream as recommended by Ana as well. For those wanting to follow her steps on her distressing the legs you can follow that here as I did not follow it to a T, although I would definitely recommend it!

Table base with first layer of Milk Paint
(to be continued) in Part 2