
. . . . .
I don't remember how I stumbled across Ana White's site but somehow I did; immediately I was drawn in. It's one thing to see Ana build a nice table, bench or headboard and think, "that looks easy but she's a pro" and entirely something else to see the incredible Brag Posts that everyday people like myself submit. It was definitely the brag posts that convinced me I could actually build this stuff! Just reading the comments and following the brags, I already had a handful of other bloggers and DIYers I was following. I was hooked!
Initially I set out to build the Farmhouse Table. I went and bought the lumber and had everything ready to go and as fate would have it before the first lick of work was started I saw another table on Ana's site and knew immediately, this was the table I had to build. The table that changed my mind was Ana's Husky Farmhouse Table, with store-bought legs built for her sister. Starting at $50 a leg I knew I was going to have to get creative to come up with a convenient solution for the legs. This put the project on hold for a bit.
After a few weeks of reading blogs and seeing ordinary people transform ordinary items into new treasures, I began to look at everything differently. An old door was no longer an old door but part of a hall tree and the glass panes - picture frames. Actually, it was an old wooden door with glass panes leaning against and even older shop that gave me pause. I parked the car and knocked on the door of a house adjoining the property and was greeted by a lovely lady who told me she just set it out to sell. I asked her price and she was willing to sell it to me for $10 as the backside has some scratches from the old dog; I told her she had herself a deal! I was in my car so I'd have to come back with the truck. 30 minutes later I was back. If you knew my luck you'd not it was no surprise that just then, it started raining. Now I'm in a rush to get the door loaded without breaking any of the panes when out of the corner of my eye I saw an old headboard and footboard, broken and busted. They weren't anything particularly nice to look at but the posts seemed to be in good shape - I had found my legs! Soaking wet, I trodded back to up the door and asked how much for the legs. They were garbage she said, unusable and I could take them no charge. "Come back and pay me whatever if you can use them", she said. I'm happy to report, I stopped in to pay her for those legs recently; she told me seeing a picture of the result was payment enough and refused to accept a dime. There are still great people in this world. Sometimes you might have to knock on a strangers door to meet them!
 |
| The legs and lumber needed to build the base. |
. . . . .
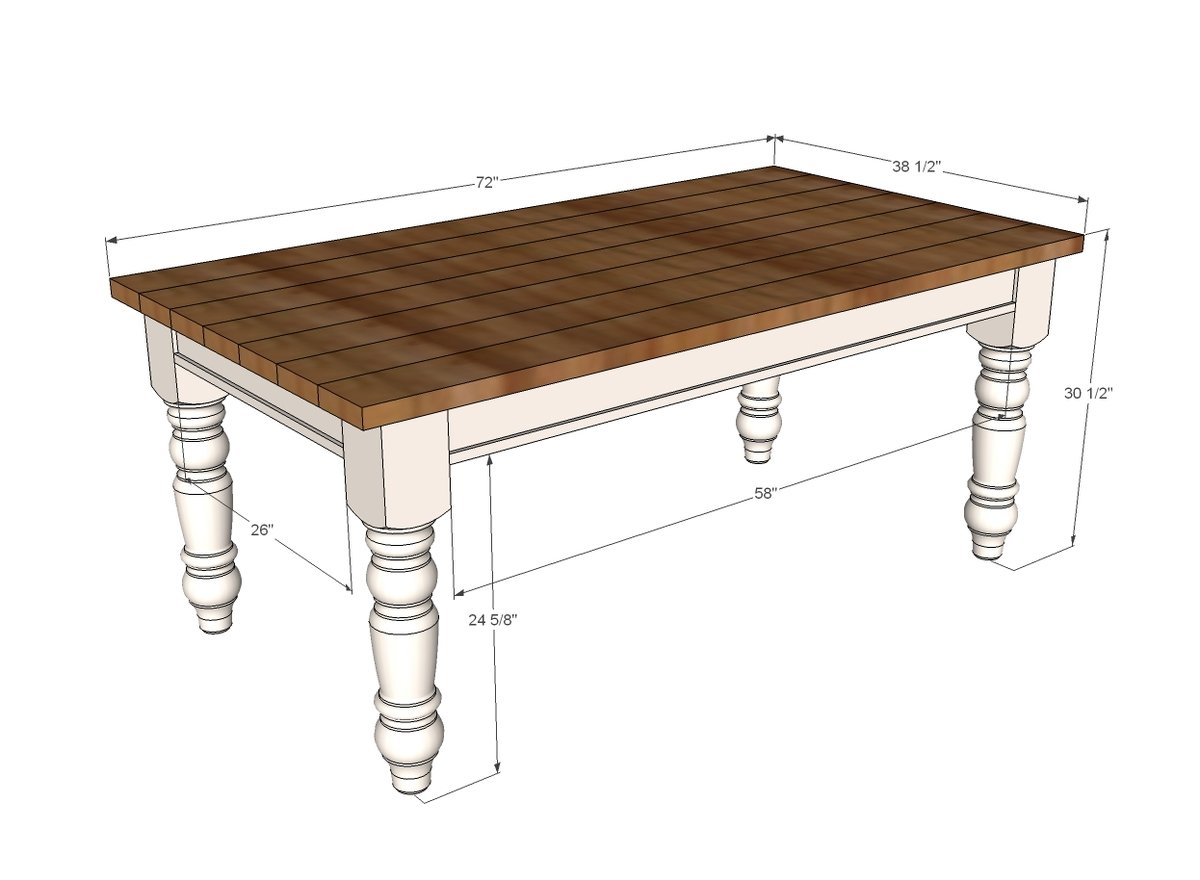
You can find the plans, shopping list and cut list for the Husky Farmhouse Table in PDF form here. To the left I have the legs and lumber cut to plan and ready to be assembled. I will talk about the finish shortly, but I wanted the legs in particular to have a very aged look so I opted not to fully sand them in hopes that the paint wouldn't stick as easily so I'd have more chipping and cracking. This didn't quite work to the extent that I'd hoped but I am still pleased with the results nonetheless. The measurements below show that from the bottom of the legs to the top of the planked tabletop to be 30-1/2". Subtracting the 1-1/2" that is the actual measurement of the 2x4 tells me I have to cut my legs to 29". This isn't mentioned in the cut list so I thought I'd share that for anyone looking to repurpose their own legs for this project. As you may notice I had to fill in quite a few holes with wood filler from where the head and footboards were removed. the holes were fairly deep so I used thin pieces of 2x4 to fill in the holes before I filled the rest in with wood filler. I'd never read anywhere or been instructed to do this it just seemed like an easy way to conserve wood filler.
 |
| Courtesy of Ana-white.com |
When assembling the base make sure to follow the instructions regarding placement of your pocket-holes. You will want to drill (2) 1-1/2" pocket-holes at the end of each apron for attaching to the legs but also make sure to drill holes facing upwards on the inside of the aprons for attaching the tabletop.
 |
| Legs and aprons assembled |
The picture above shows the legs and aprons assembled. I used wood glue and 1-1/2" Kreg screws to attach everything. The plan calls for the apron to be inset 3/4" all the way around. I used leftover pieces of the 1x2's to get my 3/4" inset.
 |
| 1x2 scraps used for 3/4" inset |
It is also recommended by Ana to set out the 1x2's a little for a decorative touch and so I just used my pencil as my guide on this before nailing in place.
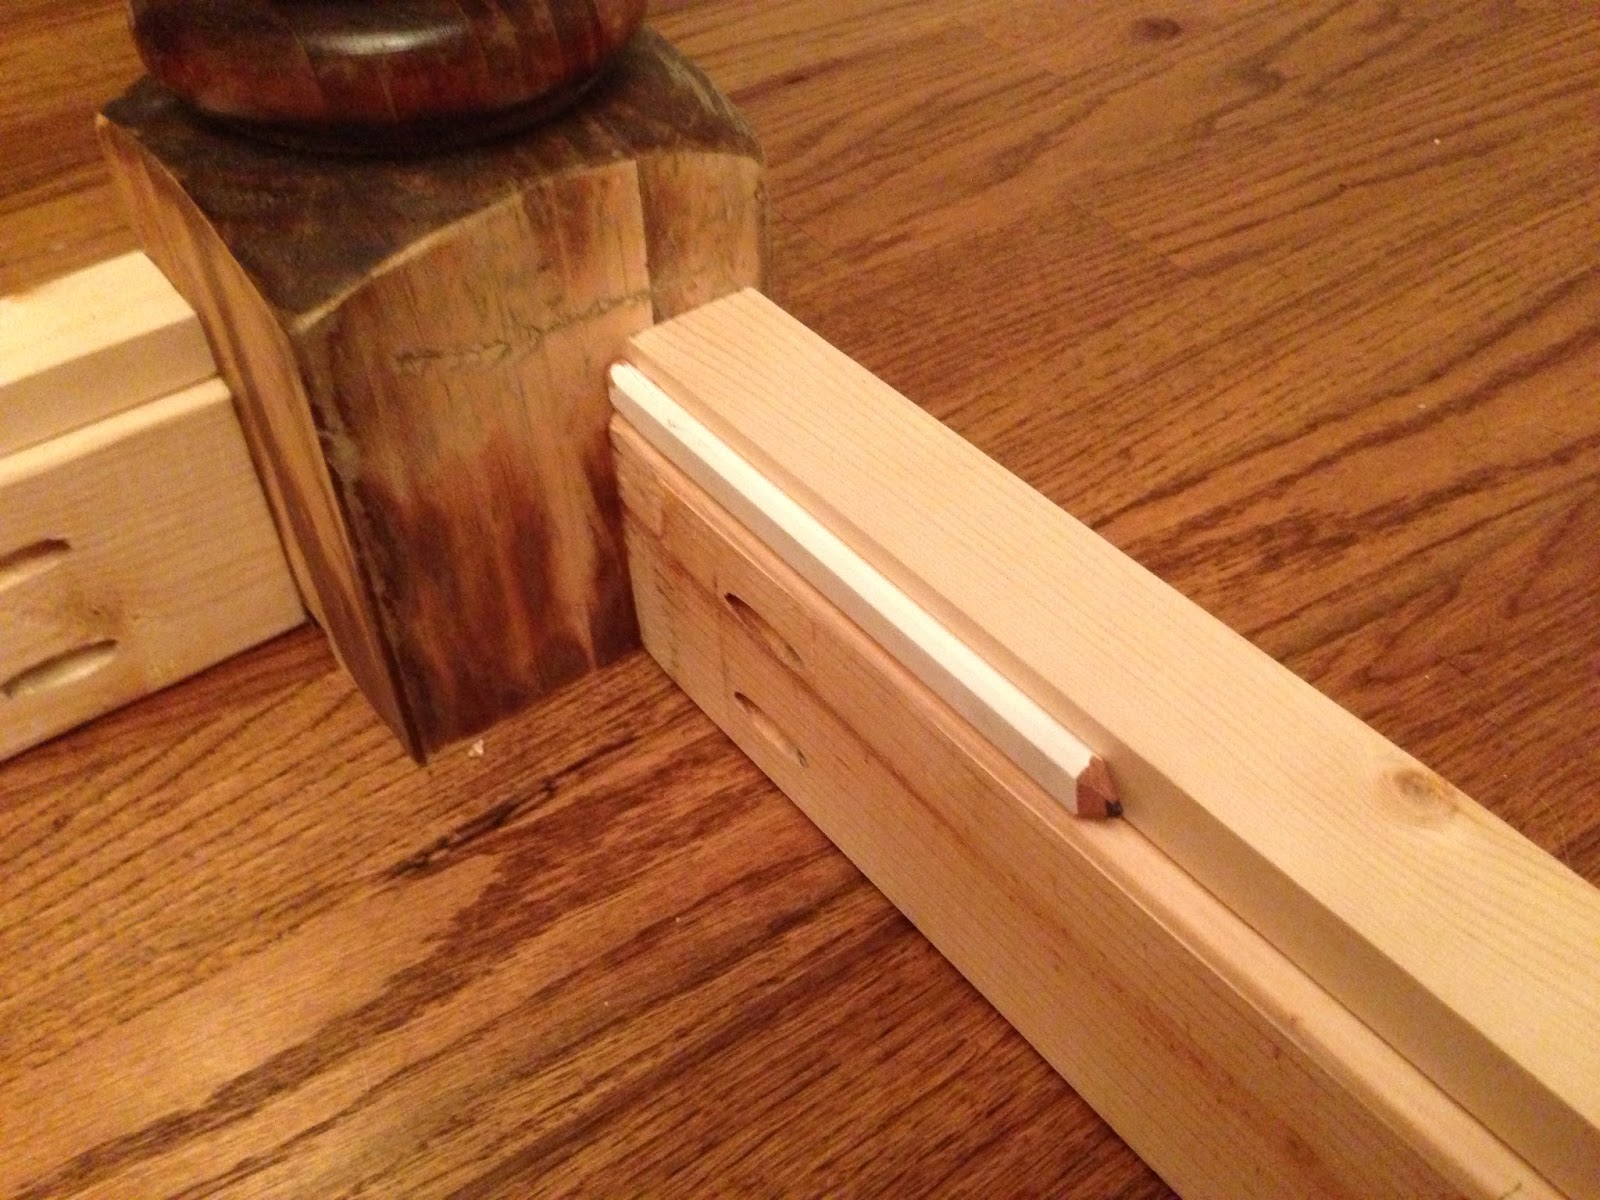 |
| Pencil used to outset for decoration |
I stained the aprons but forgot to picture that step and later slapped on the first coat of Milk Paint in Light Cream as recommended by Ana as well. For those wanting to follow her steps on her distressing the legs you can follow that here as I did not follow it to a T, although I would definitely recommend it!
 |
| Table base with first layer of Milk Paint |
(to be continued) in Part 2
Great job so far can't wait to see part 2. I plan on doing this table along with one of the benches. Love the wainscot in the background as well, that's something I tried to tackle myself with mixed success.
ReplyDeleteThanks, definitely shoot me a link when your done! Supposedly my neighborhood offered the wainscoting as part of a trim package that supposedly very few people opted for as it was quite expensive. Luckily for me the prior owners did!
Delete